How to check for forbidden or required content
Find words that should or should not be on your page.

Contents
What is a content check in Semonto?
With a content check, you ask Semonto to regularly scan a particular page of your website to find a specific phrase or word. This test can be helpful in two scenarios: either you want the content to be present, or you don’t. Let’s have a closer look at both.
Required content: words or phrases that need to be there
When you check for required content, you are telling Semonto: “This word or phrase should be present on my web page at all times. If you cannot find it, you should notify me.”
Examples of required content:
- Your company name on your homepage
- A metric that you are tracking on a landing page (e.g. a Facebook pixel)
- Your signature in the footer of a client website you have created
Why check for required content?
If a specific phrase no longer appears on your website, that can be an indication that:
- Your website has been hacked
- There is a technical issue causing your website to return a blank page
- Someone changed the content of a web page, maybe without your permission By enabling Semonto to warn you when crucial information is missing, you can intervene quickly. Want more examples? We wrote a blog post about it.
Forbidden content: words or phrases that should not be there
When you check for forbidden content, you are telling Semonto: “This word or phrase should never appear on my web page. If you do find it, please notify me.”
Examples of forbidden content:
- The word ‘error’, to spot server-side generated errors, like database connection failed.
- The phrase ‘out of stock’
How to get started with content checks in Semonto
Enable content checks
Go to your Semonto dashboard or create an account if you don’t already have one. Select Content Checks in the navigation menu. Choose the website for which you want to perform the content check. (Note: if you are not monitoring a website yet, you first need to create a monitor.) Scroll down to select Content Checks again in the secondary navigation menu. You will then be asked to enable Content Checks.
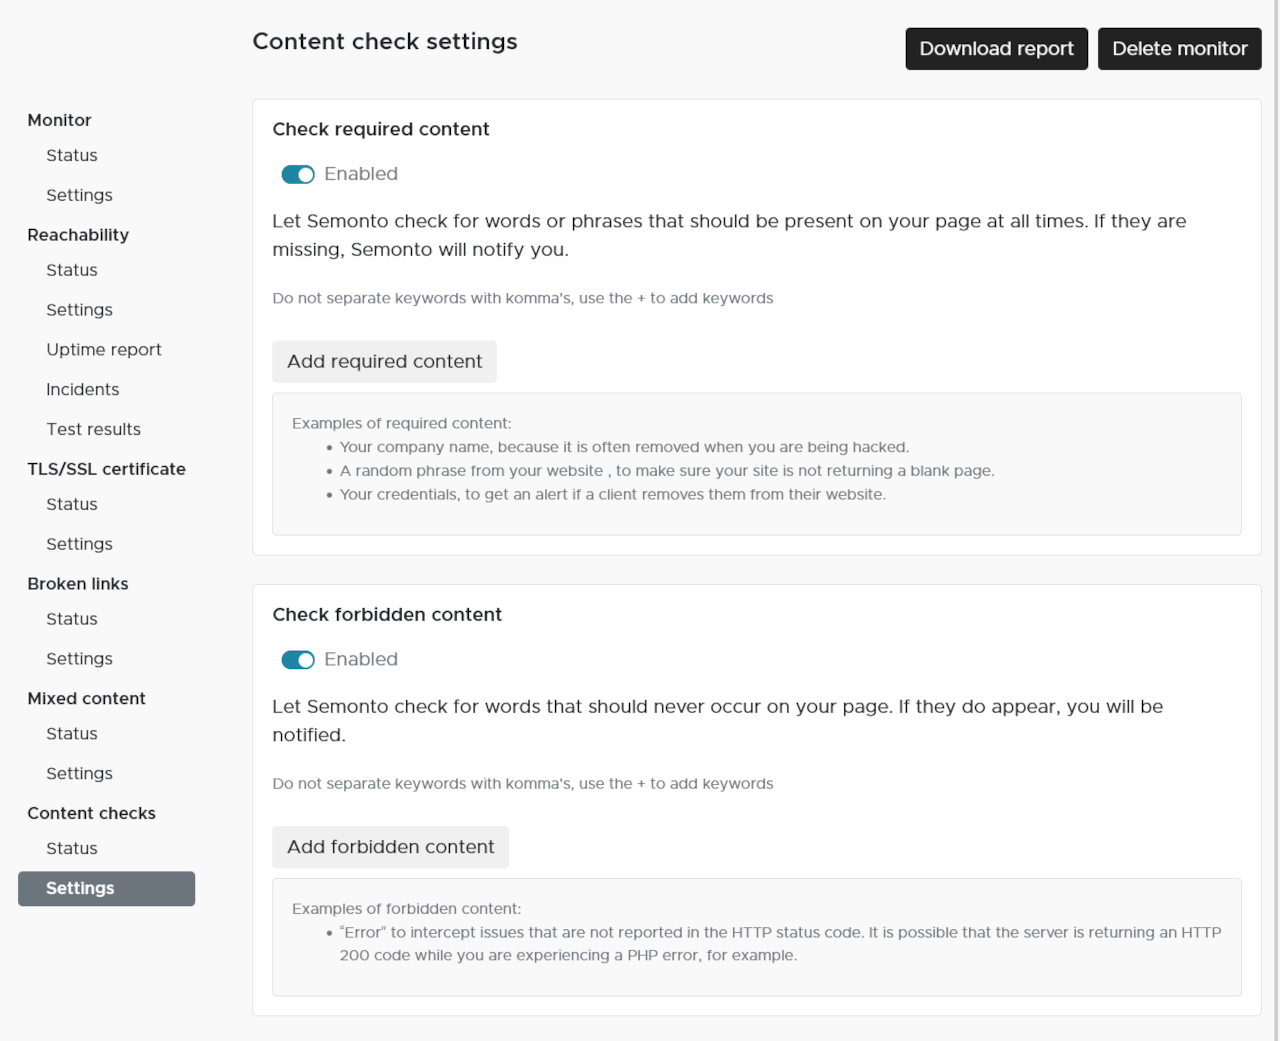
Specify keywords or phrases to scan for
Once you have enabled content monitoring, you can start adding the keywords or phrases you want to monitor. Type a word or phrase and press enter to confirm. Words that you enter together are treated as a whole. So, out of stock will only trigger an alert when it is found in its totality, not when only stock is found. You can add as many keywords as you like, using the + below the textbox.
Important to know
Content checks are performed on a page level. If you are monitoring a homepage, content checks will be limited to that page. If you want to perform content checks on a specific page, create a separate monitor for that page.
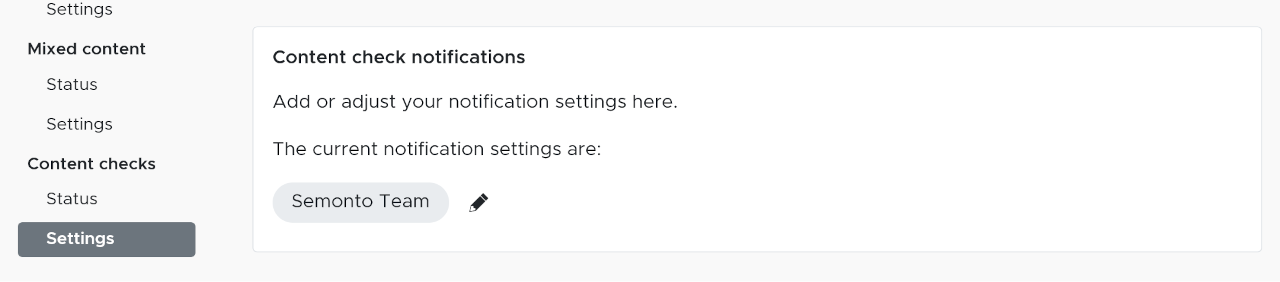
Select how you want to be notified
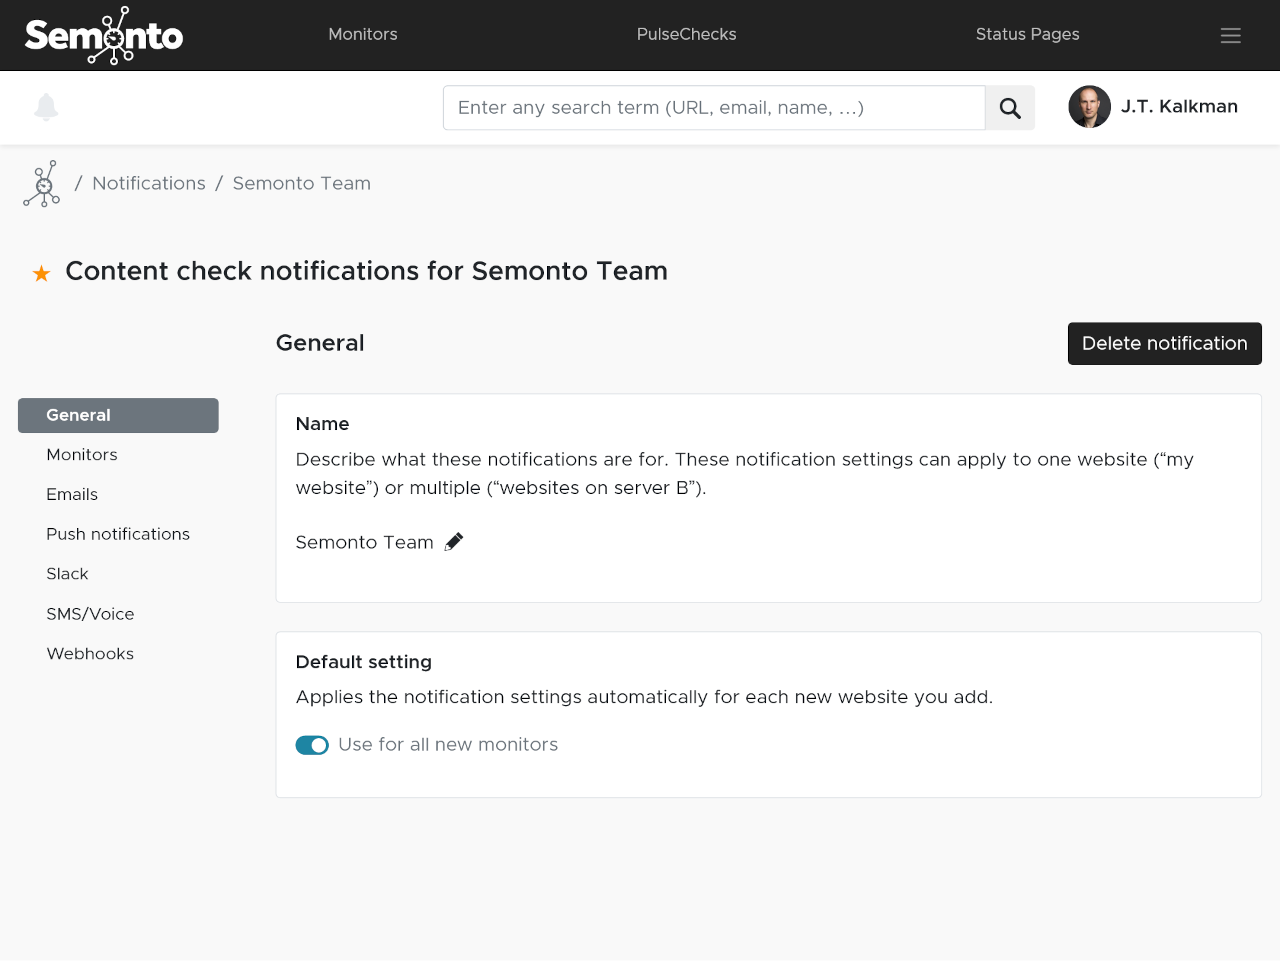
Once you have created a content check, you can decide how you want to be notified. By default, Semonto will send you an email with the results of each test, but you can also activate notifications by phone, text message, in your Slack channel and more. In the notifications section, you will see the current notification settings. Click the balloon if you want to see the details or make changes.
You can enable or disable email notifications, push notifications, Slack notifications, Teams notifications, SMS text messages, voicemail messages and webhooks by selecting each notification method in the navigation menu. If you want more detailed information about setting up notifications, read our how-to page on the topic.
Any questions? Let us know!
We think it’s very important to make a tool that anyone can use. If you encounter any problems or find something unclear, please let us know, and we will fix it. Shoot us a message at info@semonto.com.
Related guides

QuickStart Beginner’s Guide to Semonto

How to Check Your Website for Broken Links With Semonto

How to Check Your Website for Mixed Content
How to monitor your TLS/SSL certificates

How to monitor your website