QuickStart Beginner’s Guide to Semonto
If you just want to use the basic functionalities of Semonto and don’t feel like reading all the technical details, this guide is for you. With this short guide, you can get started in 1-2-3.

How to create a free 30-day trial
You can try all Semonto's features for free and without any commitment. Select "Start my free trial" on our website and we will guide you through the process..

Enter your name, your e-mail address, and the URL of the website you would like to monitor. Don't forget to start the URL with https://. Agree to the terms of service, prove that you are not a robot, let us know whether you want to subscribe to our newsletter, and you are good to go!
We will then take you to the dashboard. The results will probably not be ready yet because Semonto has only just started monitoring your website. So, you can either have a look around and play with the settings, or close Semonto and come back later to check on the results. By then, you have received your login and temporary password by e-mail.
How to log in
If you want to see how your website is doing, you can log into the Semonto dashboard at any time. On the top right of our website, you find a button to log in. This will open a new tab in which should enter your credentials. This is the email address with which you signed up and the password you received by email. If you did not receive your password by email, make sure to check your spam folder. Please don't hesitate to contact us if you need any help.
How to read the results of your website
The status overview
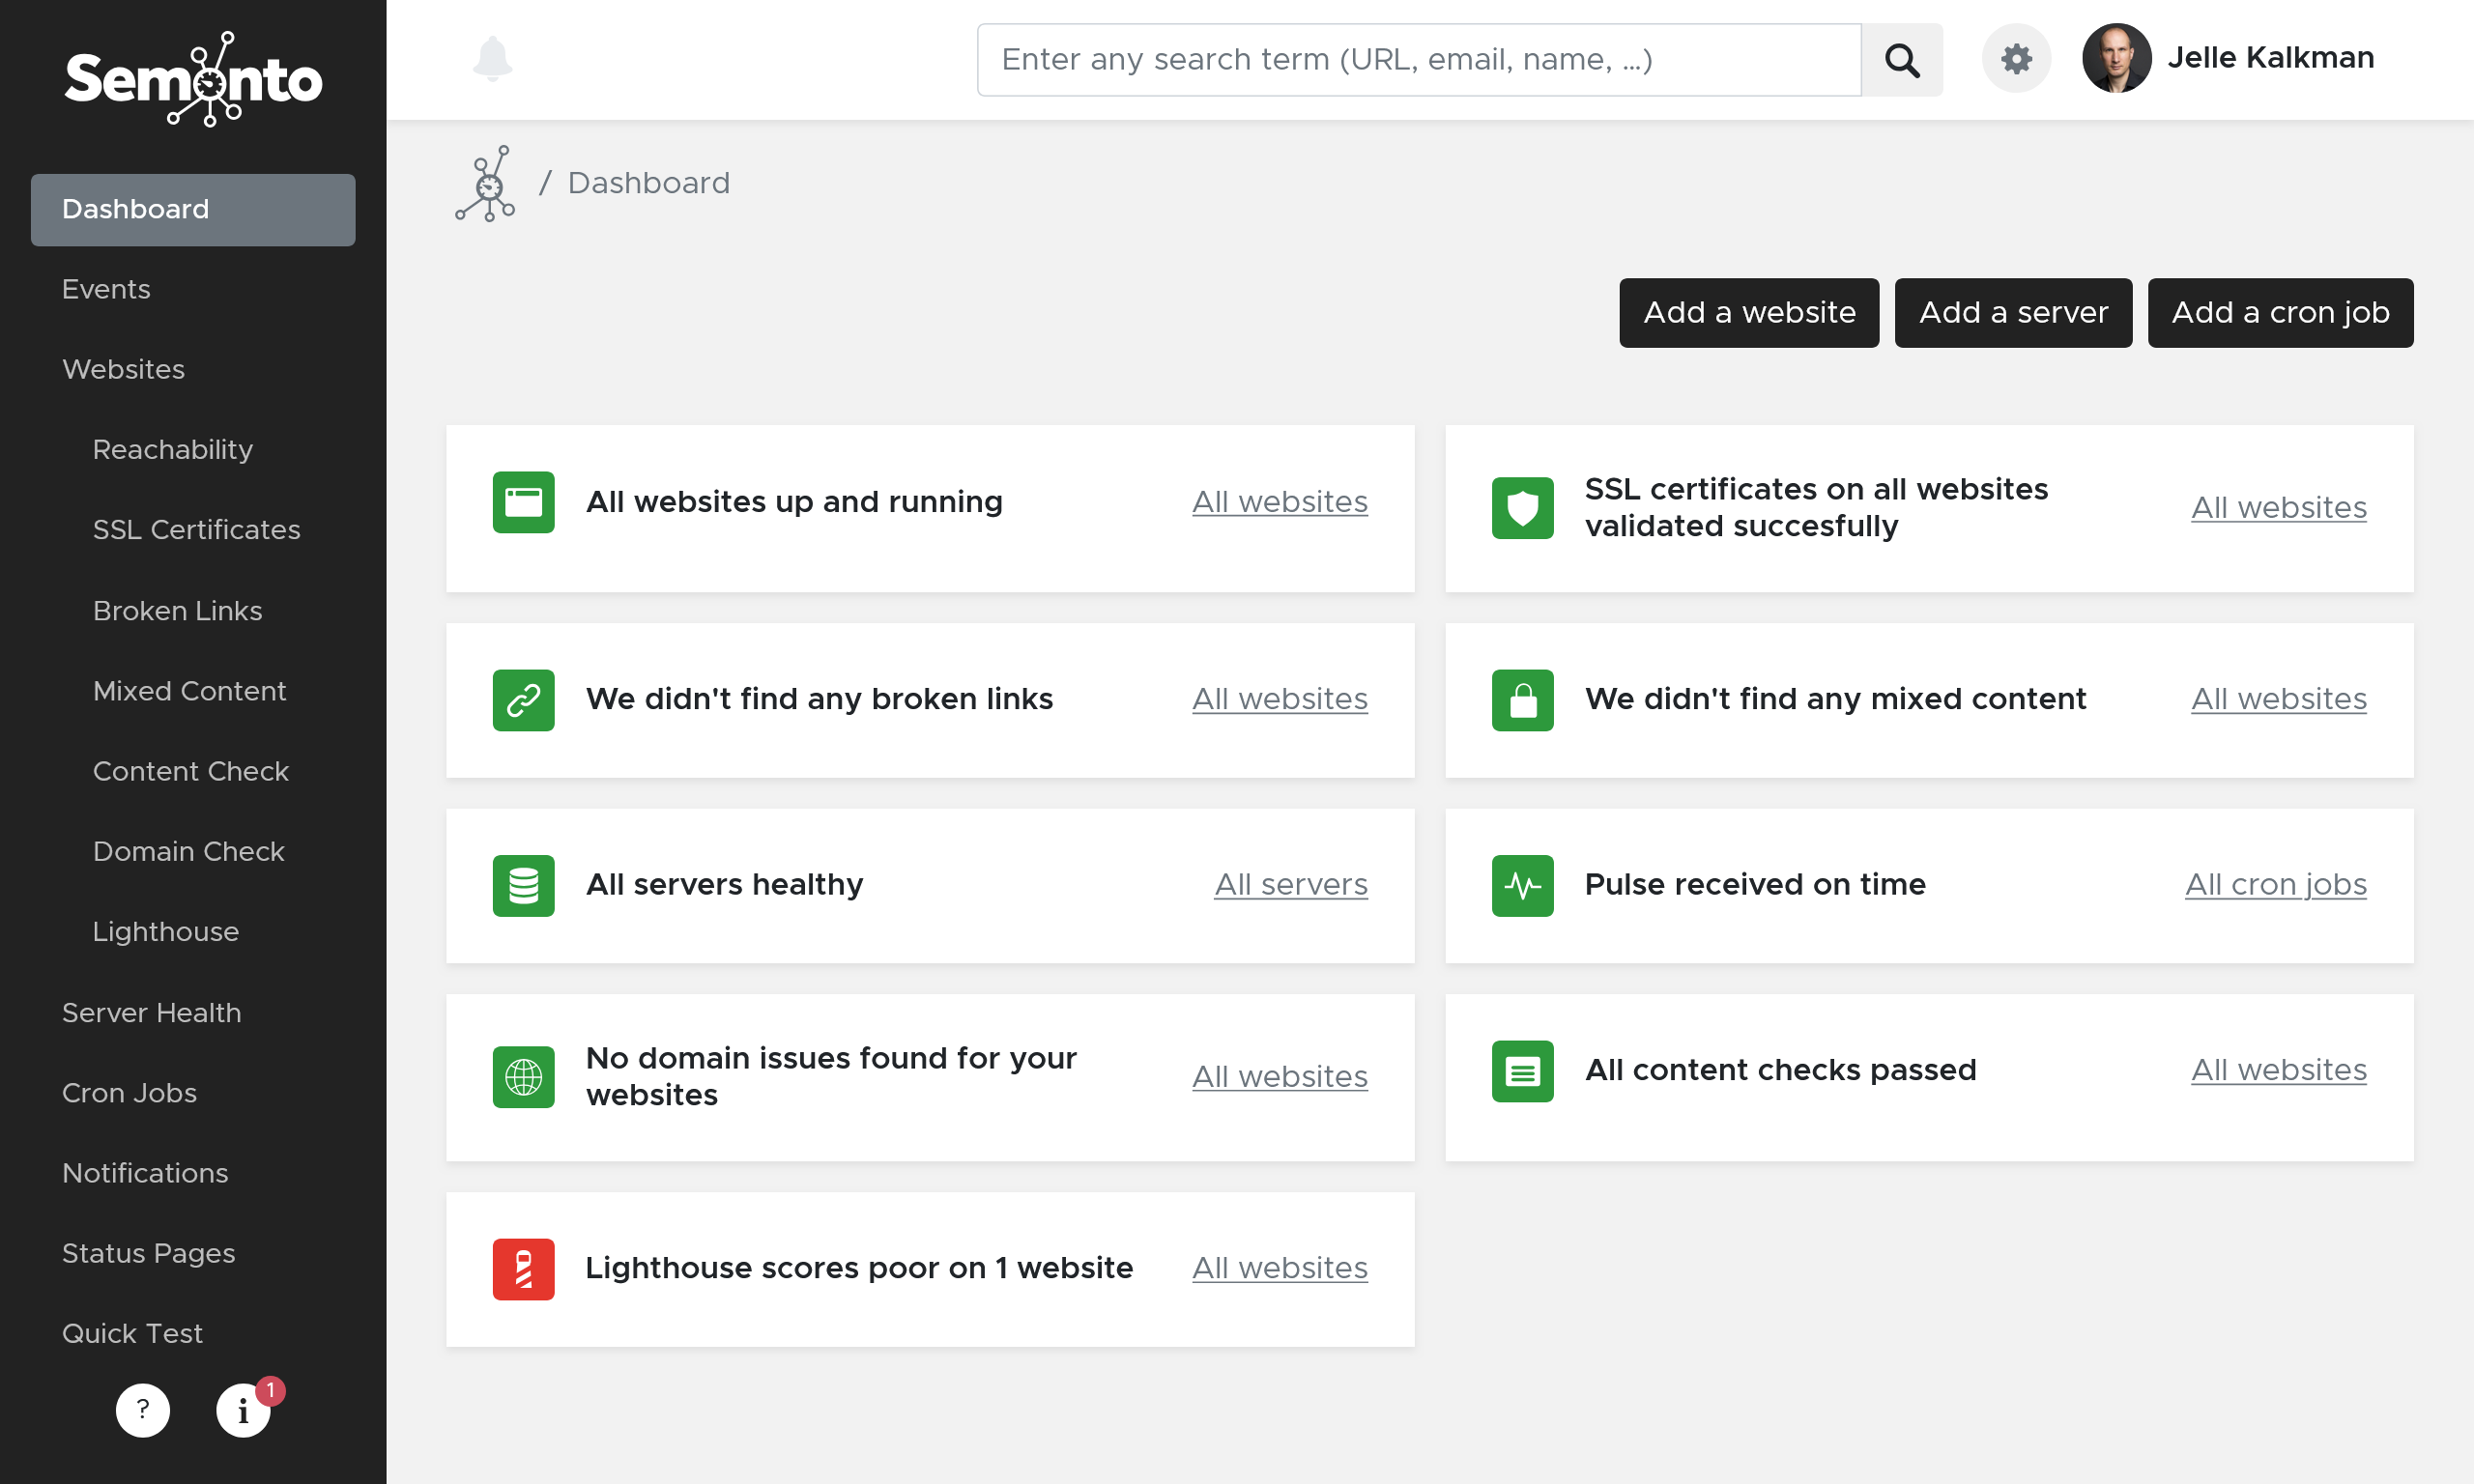
When you log in, you get an overview of all the sites that you are monitoring.
There are nine blocks informing you of nine different things that are important for your website. We have documentation on all these topics if you are not familiar with them.
- Uptime: whether your website is up or down
- HTTPS monitoring: whether your security certificate is still valid.
- Broken links: whether all links on your website are working
- Mixed content: whether all elements on your website are secure
- Cron job monitoring: whether periodical scripts are being executed successfully.
- Server health: whether your server is healthy.
- Domain monitoring: whether your domain name is still valid.
- Lighthouse monitoring: whether your website is optimized for speed, SEO & accessibility.
- Content Checks: whether certain words or phrases appear on a web page. This is an optional feature for advanced users. You have to activate it to get results.
You can click through to get more details on each of these features.

These detailed views can also be accessed directly by clicking the items in the menu on the left side of your screen.
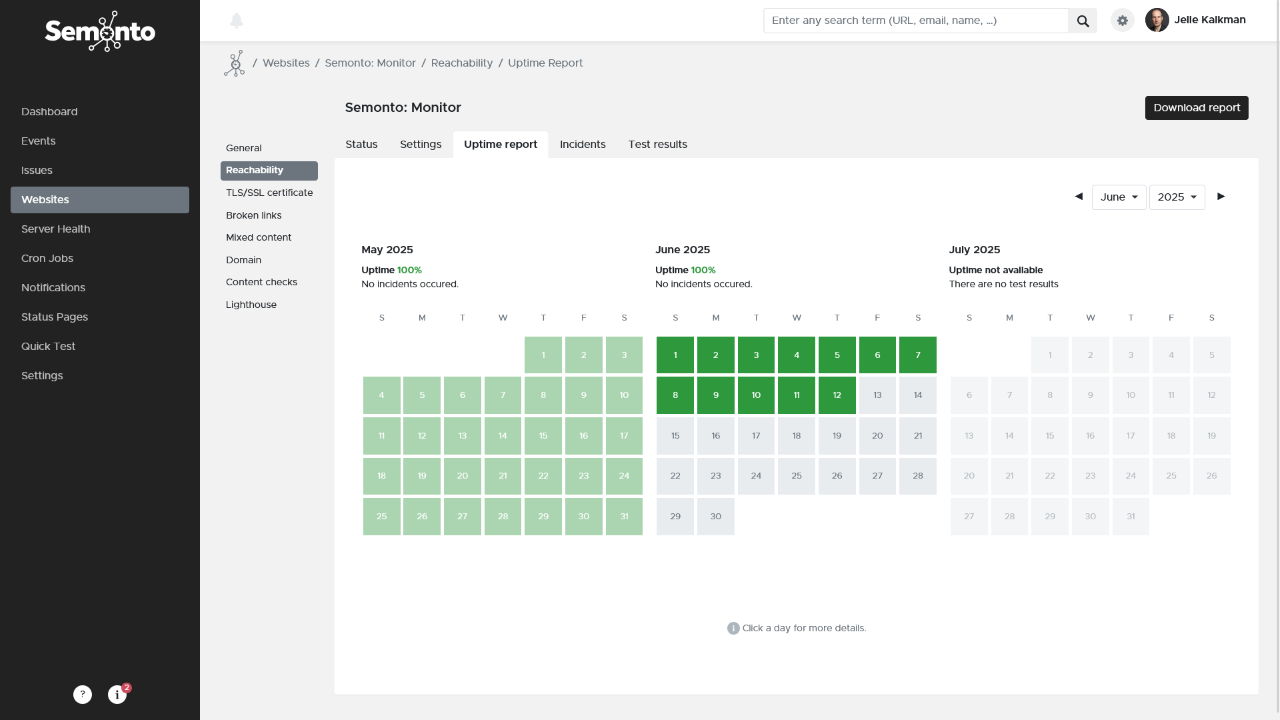
How to see the monthly uptime result of your website
- Go to Websites
- Select the website you want to see the results for
- Click on Show Uptime report
- We will also send you a monthly report by e-mail!

How to decide who gets notified (and how) when an issue arises
You can notify multiple people when something goes wrong. For example: your web developer, yourself, your manager or your clients. These people are collected in a Notification Group. When you created your first Monitor, a new contact group was automatically created for this monitor. Go to Notifications and you will find it as a new group. Click on the URL to start editing the notification settings. You can rename the Notification Group if you want.
Monitors
You can add or delete the monitors for which you want to be alerted. You can select more than one, so if you are responsible for multiple websites for the same company or client, you only have to enter the notification settings once.
E-mail addresses
You can decide to which e-mail addresses notifications should be sent. You can add multiple addresses if you want multiple people to be informed of issues. This way, you always have a back-up.
Push notifications
Semonto is also available as an app on your smartphone. Once you have downloaded the app from the App Store or Google Play, you can enable or disable push notifications. Push notifications are alerts on your smartphone.
Slack messages
You can have Semonto send notifications to one or more Slack channels, for example, to the workspace of a specific team. Check our easy guide to get started.
Microsoft Teams notifications
Semonto’s notifications can appear in a channel or group chat in Teams. We have created a step-by-step guide to help you set this up.
SMS messages
If you want to receive an SMS when something goes wrong, you can enter one or more phone numbers. To send messages via SMS, you need to buy SMS credits in your account, which you will find at the top of your screen on the right. Click on your name to see the full menu.
Voice messages
With phone notifications, you receive a call when something happens to your website or server. An automated voice message then informs you about the issue. Voice messages are the best way to ensure that you do not miss the notification between your already loaded email inbox and all other messages and notifications that you receive. Credits are required for this service. Go to your account (on the top right) to purchase credits.
Webhooks
If you want to use webhook alerts, you can create them here. (This is for advanced users.)
How to set notifications as default
If you prefer not to modify the notification settings for each monitor you create, you can mark your preferred notification settings as default. The settings will then automatically be applied when you create a new monitor or cron job. When you are editing your notification settings, you will see a switch at the top of the page called “Applies the notification settings automatically for each new monitor you add" Activate the switch to mark your notification settings as default.
If you are satisfied with the notification settings, you can simply exit the screen. Your changes have been saved automatically.
How to adjust your subscription
You can find your current subscription in your Semonto dashboard when you go to “Settings” in the menu.
You can see your current usage and the tests you have activated. If you want to increase or decrease the number of websites or servers you want to monitor, you can do so in your dashboard. If the changes affect your subscription, a message will appear to let you know.


