Webhooks
Semonto allows you to use webhooks to notify your application when an incident happens on your websites, so it can trigger a response within your current workflow.
Contents
Each webhook will be a POST request with a JSON body containing information about the status of your websites. You can use webhooks when monitoring reachability, broken links, mixed content, or the execution of cron jobs.
How to add a webhook
You can start receiving webhook notifications using the steps in this section:
- Create a webhook endpoint: Create a webhook endpoint (URL) that can accept POST requests with JSON data.
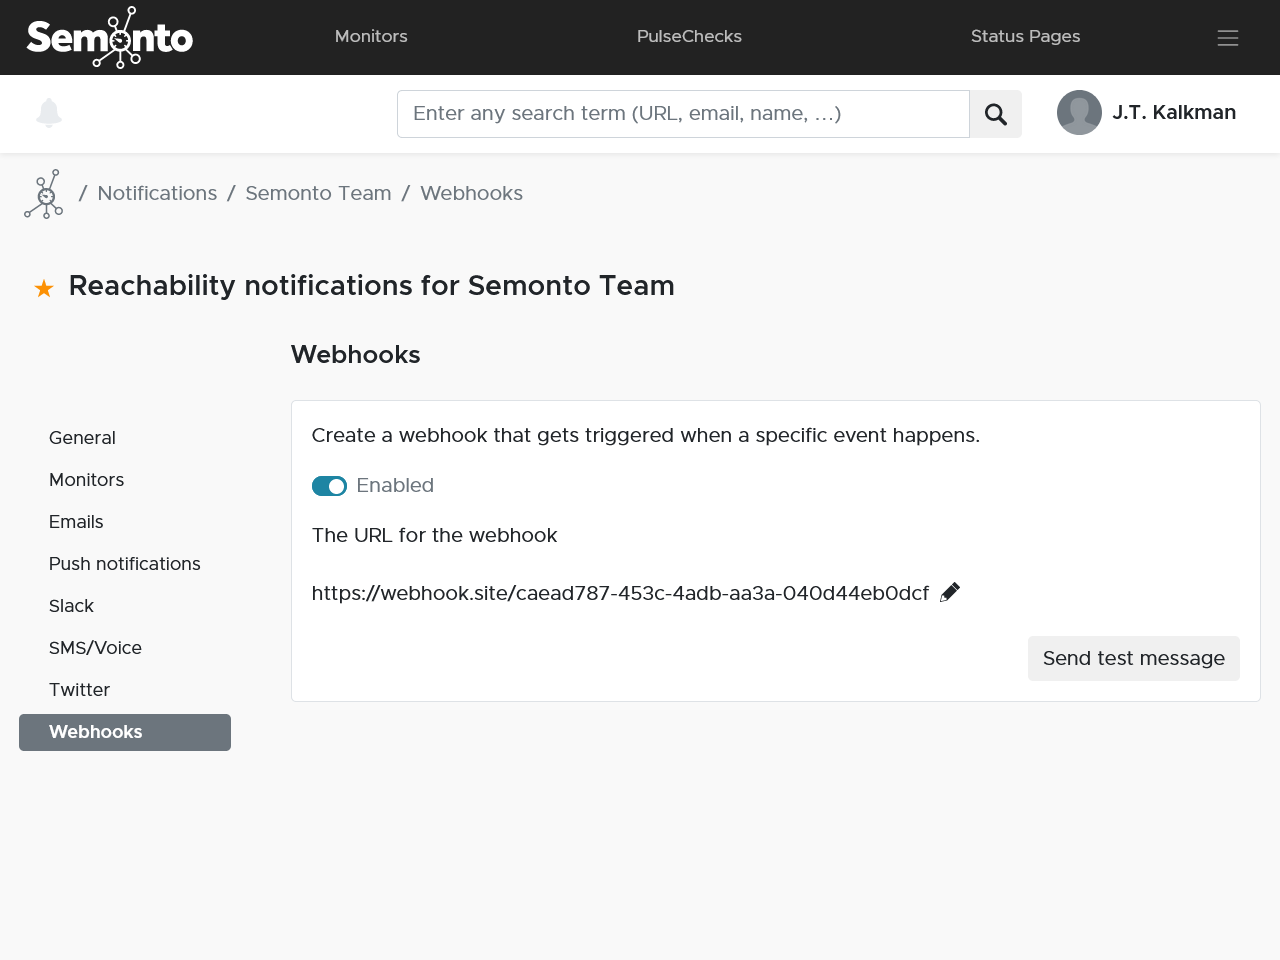
- Enter the webhook URL: Go to the Notification settings in Semonto. Select the test for which you want to activate a webhook and scroll down to the Webhooks section. Enter your webhook endpoint URL in the dashboard and save your entry.
- Test the webhook: Once created, you can send a test message.
How to interpret the webhook data
You can expect the webhook to return data in the following format.
Webhook data for reachability notifications
- The ID of the monitor
- The type of test results: in this case, ‘reachability’.
- The status as a string in which 0 = OK, 1 = warning, 2= critic, and 3 > error.
- The name of the monitor.
- The test date.
- The tested URL.
- And for each test, the name, status and test info.
This is an example of what that could look like:
{
  "id": 2858,
  "type": "reachability",
  "status_str": "critic",
  "status": 2,
  "name": "semonto website",
  "test_date": 1678874679,
  "url": "https://semonto.com",
  "tests": [
    {
      "key": "ping",
      "status": "1",
      "info": "31.474849",
      "friendly_name": "HTTP Ping",
      "status_str": "Warning"
    }, {
      "key": "reachability",
      "status": "1",
      "info": "14.898855000000001",
      "friendly_name": "Reachability",
      "status_str": "Warning",
    }, {
      "key": "prtc:8080",
      "status": "1",
      "info": "15000.715171 - execution expired",
      "friendly_name": "Check port 8080",
      "status_str": "Warning"
    }
  ]
}
TLS/SSL notifications
The webhook data for TLS/SSL certificate notifications contain the following data:
- The name of the monitor.
- The status as an integer and as a string. 0 means OK, 1 means warning, 2 means critical, and 3 or higher means error.
- The time the test was performed.
- The tested URL.
- The expiry date for the certificate as a UNIX timestamp.
- The number of days the certificate remains valid.
- Whether the certificate has expired.
- Whether the certificate expires soon.
- Any other errors encountered while validating the certificate.
This is an example of what that could look like:
{
  "id": 2858,
  "type": "tls_ssl_certificate",
  "status": 4,
  "status_str": "error",
  "name": "semonto website",
  "test_date": 1678874679,
  "url": "https://semonto.com",
  "expiry_date": 1678874679,
  "days_valid": 0,
  "expired": true,
  "expiring": false,
  "validation_error": NULL
}
Broken links and mixed content notifications
These are the webhook data you can expect to receive for broken links and mixed content notifications:
- The name of the monitor
- The status as an integer and as a string. 0 means OK, and 1 means warning, broken links or mixed content found.
- The time the test was performed.
- The tested URL.
- The number of broken links/cases of mixed content and the number of broken links/cases of mixed content found in the previous test run.
Here is an example set of data:
{
  "id": 2858,
  "type": "broken_links",
  "status": 1,
  "status_str": "warning",
  "name": "semonto website",
  "test_date": "1678874679",
  "url": "https://semonto.com",
  "number_of_broken_links": "30",
  "previous_number_of_broken_links": "50",
}
Cron job notifications
The data for cron job notifications contains:
- The name of the cron job monitor.
- The status as an integer and as a string. 0 means OK, and 3 means expired.
- The interval in seconds.
- The URL to call from your script.
- If the cron job expired, how long it has expired in seconds.
- The timestamp of the last pulse with the IP address.
This is an example of what the returned data could look like:
{
  "id": 2858,
  "type": "pulsecheck",
  "status": 0,
  "status_str": "ok",
  "name": "semonto DB backup",
  "interval": "60",
  "pulsecheck_url": "https://PulseCheck1.semonto.com/pulsecheck/?upid=51OCK09CEX",
  "time_expired": 70,
  "last_pulse": 1678874679,
  "ip_address": "81.204.186.6",
  "ip_hostname": "81-204-186-6.fixed.kpn.net"
}
Need any help?
Don’t hesitate to reach out to our team if you need any help setting up your webhooks. We are happy to help!