How to use the Semonto Health Framework
Learn how to monitor the health of your server using an easy framework.

Contents
Server health monitoring allows you to keep an eye on your server at all times. To define what aspects of your server health you want to monitor, you have to create a health endpoint. In this article, we explain how to create a server health endpoint using the Semonto framework.
To get started quickly, a server health endpoint written in PHP is available. This framework reveals the health condition of the server for external monitoring. Read more about server health monitoring in this guide.
You can find the source code on GitHub.
This framework includes default tests for monitoring the used disk space, the memory usage, the server load and if a connection to a MySQL database can be made. And the framework can be easily extended with your own custom tests for your server.
Requirements
This framework is tested with PHP 7.4 and higher. Our default available tests have the following requirements:
| Test | Dependency |
|---|---|
| Disk space Disk space inode | In PHP exec and shell_exec command should be enabled.The df command should be available and enabled. |
| Memory usage | In PHP exec and shell_exec command should be enabled.vmstat should be installed. |
| Database tests | The database tests are made to work with MySQL and MariaDB. |
| Server load | Requires PHP's sys_getloadavg, this is not available on windows. |
Getting started
You need to copy or clone all the files from the repository to an endpoint on your server. Typical endpoints are https://yourserver.com/status or https://yourserver.com/health.
In the config directory is an example config file. Rename this config file to config.php. In this config file you can specify how the framework should connect to a MySQL or MariaDB database and which tests should be run and you can set the configuration options for the tests. The function getConfig() returns all the configuration options.
The secret key
Each server health monitor in Semonto has its own secret key. You can find this key in the settings for this server in Semonto. You should add this key in the config file. This key will be sent in the request in the health-monitor-access-key header. You should not change this header in Semonto if you want to use our framework. If you update this key in Semonto, make sure to update the key in the config file.
Caching
To reduce the load on the server, the results can be cached. This caching helps against spikes of server resources when this endpoint is called by multiple services. The default location for the cache is the system tmp folder. You can change the cache location and the life span of the cache. By default, the cache expiration time is 45 seconds.
The config file
In the getConfig() function you can specify which test should run and how the framework can connect to a MySQL or MariaDB database.
The connection with a database can be made by adding the database configuration in the config file or by specifying which function to use to connect to the database. If you use a specific function, this should return a mysqli object or false if the connection could not be made. The name of this function should be added to the key function_name.
In the array tests you can add the tests that should run and you can supply some configuration options for each test. Custom tests should also be added to this array in order to run. The configuration options are for example disk space thresholds, memory usage thresholds or which disks should be monitored.
The following config file indicates that a database connection should be made and that following tests must run on every request for the server health status:
- The current server load,
- Disk space of disk
/dev/vda1, - A test if data can be fetched from table
test_serversin a database, - And three custom tests without any further configuration.
$config = [
  'secret_key' => '', // The secret key shown in the settings for this server in Semonto.
  'cache' => [
    'location' => sys_get_temp_dir(), // The directory to store the cache.
    'life_span' => 45, // The maximum life span for the cached results in seconds.
    'enabled' => true
  'cache' => ],
  'db' => [
    'initialise_type' => 'credentials',
    'function_name' => null,
    'connect' => true,
    'db_host' => 'https://my-db-server.com',
    'db_user' => 'DBUSER',
    'db_pass' => 'DBPASS',
    'db_port' => '3306',
  ],
  'tests' => [
    [
      'test' => 'ServerLoad',
      'config' => [
          'type' => 'current',
          'warning_threshold' => 5,
          'error_threshold' => 15
        ]
      ], [
      'test' => 'DiskSpace',
      'config' => [
          'disks' => [
            [
              'name' => '/dev/vda1',
              'warning_percentage_threshold' => 75,
              'error_percentage_threshold' => 90
            ],
          ]
        ]
      ], [
        'test' => 'MySQLFetchOperation',
        'config' => [
            'database' => 'semonto_database',
            'database_table' => 'test_servers'
          ]
       ],
     [
      'test' => 'NotificationQueueTotal',
      'config' => []
    ], [
      'test' => 'NotificationQueueFailed',
      'config' => []
    ], [
      'test' => 'NotificationQueueDelayed',
      'config' => []
    ],
  ]
];
Default available tests
This framework provides the following tests: ServerLoad, DiskSpace, MySQLPing, MySQLFetchOperation and DiskSpace. Note that the MySQL tests also work on MariaDB without any changes.
ServerLoad
The server load test has three configuration options. The type which can be current, average_5_min or average_15_min. And a warning and error threshold. The default thresholds are 5 for warnings and 15 for errors.
You can register multiple server load tests, for each type only one. And you should adjust the warning and error thresholds to the amount of CPUs your server has available. Check this guide for more information on system load.
DiskSpace
You can specify multiple disks for this test and for each disk you can specify the warning and error threshold percentages individually. These thresholds have 75% and 90% as defaults. If a disk can’t be found this will result in a warning.
MySQLPing
This test pings a MySQL database and measures how long it takes. There is no extra configuration needed except the DB connection settings.
MySQLFetchOperation
This test tries to fetch a number of rows from a database table. You need to specify the database name and the table.
MemoryUsage
The memory usage test has config options for the warning and error percentage. The defaults for these percentages are 90% and 95%.
Custom tests
You can easily extend this framework with your own custom test for the server’s application. Some examples of custom tests are:
- Monitoring the number of items in a queue that aren’t processed yet
- The number of failed items in a queue
- Last date your antivirus ran
- Number of documents in a directory
- … almost anything you want
Creating custom tests
Each test is performed by its own class which is stored in its own file. Those custom test files should be stored in the custom tests directory src/ServerHealth/customTests. This is where the framework will look for the files. It is also important that the file name is exactly the same as the name for the test.
For example if you have a test with the name NotificationQueueFailed, then this should be in the directory src/ServerHealth/customTests with filename NotificationQueueFailed.php.
In the custom test directory is an example file to get started with your custom tests.
A more human-friendly name for each test should be set with the name attribute of your test class.
Each custom test must have a method performTests(). This method should perform the actual tests. Optional configuration options and the database connection are inherited from the framework and available in the config attribute.
Test results
The method performTest() must always return an instance of ServerHealthResult, so make sure to handle all possible outcomes for the tests. Class ServerHealthResult has two required parameters in the constructor. The name of the test, best to use a human-friendly name, and the status. For the status you can use the following values: ok, warning or error. Or you can use the class ServerStates with corresponding class constants.
There are two optional parameters: description and value.
The description should be a human friendly string about the test result. For example: 2 min since the last successful run.
The value should be a numeric value. This numerical will be displayed in Semonto if the human friendly text is not available or to draw a chart. For example a percentage or a number of failed items in a queue.
Make sure to register your custom tests in the config file. If all goes well, this endpoint will respond in a JSON format that Semonto can understand.
Start monitoring!
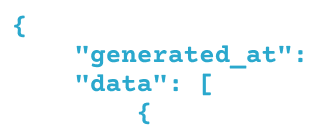
You can now configure Semonto to start monitoring this endpoint. You can read more about this in this guide. If everything goes well the results should look like the example at the top.
Feel free to contact us if you need any help setting this up.